
- Summer is not only a good time to enjoy a well-deserved holiday, to escape to the beach or to the mountain, to stuff yourself with ice cream or to go to festivals.
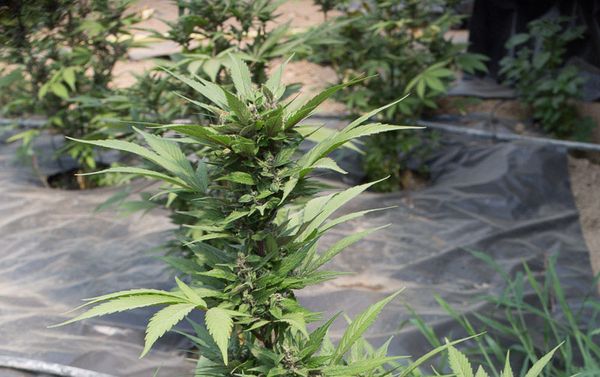
- Yes, the sun, the heat and the long days are the ideal conditions to bring the best out of your autoflowering marijuana plants. You just need a balcony, a terrace or a garden and some good seeds.
- If you follow our advice, in two months you can enjoy a great harvest of juicy and resinous buds. Shall we start?
The key: maximising resources from the start
If you're going to grow some autoflowering seeds, there's one thing you need to focus on. Their life cycle is so short -two months after planting- that it is vital to maximise resources from the start. While feminised varieties, whose life cycle can be as long as four months, can have time to recover from plagues or nutritional mishaps, autoflowering strains develop at full tilt, meaning that every step matters.
But don't worry, their genetics make them true champions of resistance. Autoflowering varieties are genetics crossed with Ruderalis, a species from the cold regions of northern Europe that has adapted to tough environmental conditions, developing extraordinary speed and high resistance to harsh weather conditions.
That said, we insist, through good planning from the start, which enables your autoflowering plant to take advantage of all possible resources, your success will be guaranteed.
When does the season last until?
Autoflowering plants like the sun and heat, and depending on the duration of the hot season, you can have several harvests. It all depends on the area you live in and its climate. In the Mediterranean area of Europe, for example, you can plant the first crop in mid-April and early May, when you know for sure that there's no longer any danger of frost and that the days are longer. This way, you'll be collecting your harvest in late July and you can sow another crop in early August, meaning that you would be harvesting again in October.
Autoflowering varieties are particularly successful in the more southern regions of Mediterranean countries because in warm regions where the winters are very mild, there's the possibility of cultivating them during many more months beyond the summer! In regions with a more favourable climate you can have up to four harvests per year.
In Atlantic, central and northern Europe it rains a lot, there is less sunlight and the summers are shorter, meaning that only one harvest is possible. The best is to sow in early June to be able to harvest in late August.
Fungi and pests
Autoflowering genetics are less prone than non to suffering from plagues of insects, though they are not immune to them. The reason is that their life cycle is so fast that insects don't have enough time to become a problem for the plant as there's no time for them to reproduce enough to do damage.
As for fungi, too much humidity should be avoided. If you want to know more about how to avoid them, you can consult this article.
Steps to follow during the cultivation
Step 1. Choose the seed that best adapts to your tastes
The range of autoflowering marijuana seeds is increasingly wide. Although at the beginning they were lacking in some aspects in comparison to feminised seeds, today's automatic varieties have nothing to envy about their cousins.
Autoflowering plants tend to be smaller, but this makes them ideal for those who want them to be discreet, for example for planting on balconies. As for its effects, if you're new to the world of marijuana and you don't regularly consume cannabis, we recommend that you start by growing varieties rich in CBD, a cannabinoid that counteracts the psychoactive effects of THC and which permits a more sustainable and controlled consumption of cannabis.
If, on the other hand, you're looking for highly powerful effects, don't hesitate and get yourself some seeds with high THC content, such as Amnesia Original Auto. However, prepare yourself for an experience not suitable for the uninitiated. You are warned! If you still don't have a clear idea, here you can find our recommendations for autoflowering seeds.
Step 2. Germination
Autoflowering marijuana seeds do not require a different type of germination to any other feminised seed. You can choose whatever method suits you, but we recommend our Dinafem method for germinating outdoors
Step 3. Prepare the soil
Autoflowering plants require an aerated substrate that allows them to make full use of available resources, to properly develop their roots and to accelerate all their metabolic processes. How is soil aerated? It's very simple; you need 10 L of substrate comprised of 1/3 coconut fibre and 2/3 ready-made peat moss or substrate, which you can find in any grow shop. If your crop is for therapeutic purposes, try to use an organic cultivation method.
Step 4. Flowerpot
The minimum size of the flowerpot you use must be 7-15 litres if you want the largest plants possible and it is important that you bear in mind that this will be the definitive pot. It is not good to transplant autoflowering plants in the middle of their life cycle to avoid stressing them.
Step 5. Irrigation
Autoflowering plants are better than feminised plants at withstanding a lack of water, meaning that it is convenient to water them sparingly -avoid drenching the soil- but very often, to encourage oxygenation. The amounts are relative and depend on the climate and environment that the plant develops in, meaning that we can't tell you an exact amount of water to use. As a general rule, make sure the soil is always humid, but that the flowerpot is not too heavy.
Step 6. Cleaning roots
If you've used a fertiliser, either chemical or organic, you have to "clean" the buds to prevent their flavour from being altered by these substances. It's very easy to do. A couple of weeks before the harvest -which will be 70 to 80 days at most after sowing the seeds, depending on the variety- you have to thoroughly water the plant with abundant clean water -it can be tap water- or water treated with reverse osmosis to wash away all the fertiliser remaining in the substrate.
Step 7.Harvest
70 to 80 days after sowing the seeds, you can harvest your buds at last. First of all, we recommend that you stop watering the plant five days before the harvest so that the soil is dry. You'll know that the buds are ready because the colour of the resin trichomes will start to change from white to amber and, in particular, because the plant's leaves start to turn yellow. Autoflowering marijuana plants are like a clock and once their ten weeks of life are up they start to decline.
We recommend that you cut the plant on a dry day to avoid humidity in the buds. The plant can be cut in branches, which you then hang in a well-ventilated, dark place.
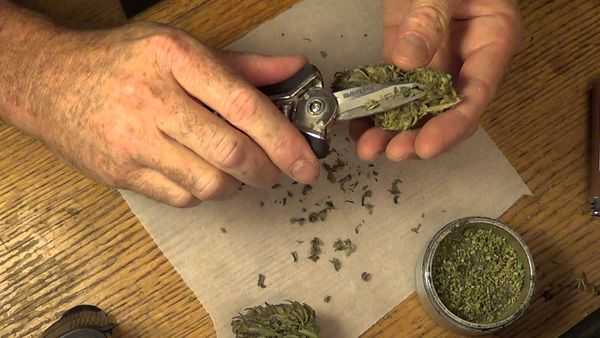
Step 8. Trimming
Later, you will have to do the trimming, which consists of trimming off the small leaves of the bud so they have a better appearance and so that they develop complex aromas during the curing process, preventing our dear weed from tasting of vegetable matter. More details on how to do the drying and curing of cannabis buds.
Comments from our readers
Read comments in other languages:
Did you like this post?
Your opinion about our seeds is very important to us and can help other users a lot (your email address won't be made public).