
- Whether you’re an expert grower or just getting started, if you grow cannabis on a regular basis, sooner or later you will end up coming across a little gem you might want to preserve for future grows.
- Generally, these top-quality elite clones pop up unexpectedly in standard grows, surprising growers with aspects like the aroma, the flavour and the effect – which might prompt them to consider preserving the plant.
- Read on to find out how to take cannabis clones easily and with a high success rate.
There are many reasons why you might want to clone a particular strain, but we'll look at them briefly as, ultimately, it all comes down to the personal preference of the grower, who, moved for subjective reasons, might be interested in preserving the flavour, the aroma, the effect, or a combination of the three, of one plant in particular.
Other potentially interesting aspects besides the organoleptic profile include vigour, flowering speed, hardiness, yielding capacity, growth structure and resistance to mould and pests.
As you can see, there are many and varied reasons why you might want to preserve this or that strain, but whether it is love at first sight or a pre-planned breeding project, what's key is knowing how to take the cuttings in the best possible conditions.
Getting the equipment
These are the items you'll need to get started:
- A clean working space(plus a comfortable, ergonomic table): Arranging the equipment in an organised manner on a clean table will allow you to work more comfortably and efficiently, while minimising the risk of the clones becoming infected.
- A rooting hormone: Rooting gels and powders promote faster root growth while reducing stress associated to nutrient deficiency. There are a variety on the market which provide great results.
- A root booster: Made from plant extracts including auxins (a growth hormone), root boosters are another way to promote root formation.
- A blade: The best option is to use a disposable scalpel. This way you'll produce accurate cuts that will result in clean cuttings with minimum risk of infection and at a very convenient price. In order to ensure the safety of both the mother plant and the clones, you should always check that the razor has been properly disinfected. Also, make sure you always have paper towels and alcohol available to disinfect your tools anytime.
- A medium-sized glass: You can keep the fresh cuttings in a glass until you are ready to trim them, dip them in a rooting hormone and transfer them to a rooting medium – e.g. jiffys, propagation cubes, soil, rockwool and water (in hydroponic systems).
- Vitamin B: Formulations containing vitamin B reduce stress by keeping the clones nourished, allowing them to focus their energy on root development.
- A mini greenhouse: The mini greenhouse will be your plant's home for about three weeks, this is why you should opt for a high-quality, durable model with ventilation slots.
- A heating mat: Available in a wide range of models, using a heating mat is a proven way to accelerate root development.
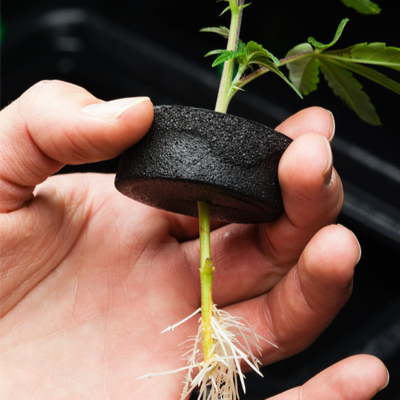
- A rooting medium: Once the clones are ready for transplant – i.e. you've cut them off the stem, you've clipped the leaves to reduce transpiration and you've dipped them in a rooting hormone – you'll need transfer them to a rooting medium of your choice, including pressed peat discs (jiffys), rockwool cubes, propagation cubes and nutrient free soil (like Light Mix by Bio Bizz). Alternatively, you can use a hydroponic propagation system that has been specifically designed for cuttings, like the RainForest by General Hydroponics Europe, a growers' favourite for many years.
- A nebuliser: Essential to keep both the substrate and the leaves moist, it needs to be suited to the size of your grow.
- High-quality water: Increase your success rate by using filtered, low mineral, chlorine-free water.
- Proper lighting: While cuttings can root under HPS lamps – provided they are placed at some distance from the mini greenhouse – fluorescent, CFL and MH lamps are less stressful to plants and provide them with more benefits.
Related post
What Are the Differences Between Planting Cannabis Seeds vs. Cuttings?
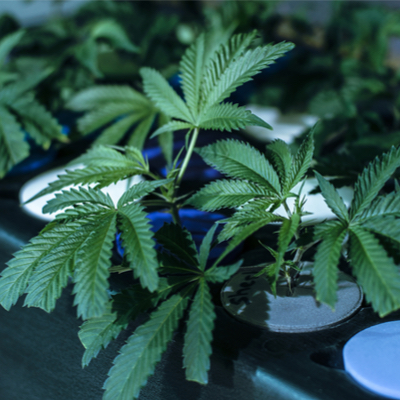
Cannabis cloning made easy
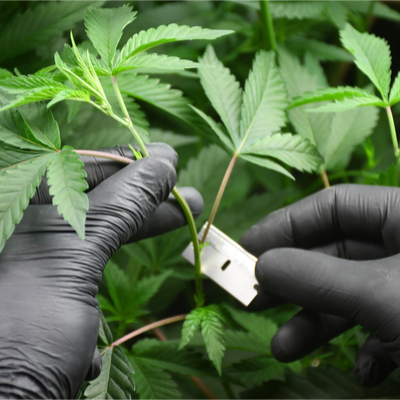
Once you've gathered the necessary equipment and selected an outstanding plant to clone, it is time to take the cuttings. Look for older branches as these will root more easily, and cut with your disinfected scalpel at a 45-degree angle making sure the cuttings have at least three nodes present. When you're done, put them in a jug of water filled to about 25 per cent of its capacity.
In order for a clone to be viable, the stem needs to be at least 10-15 cm long, and have a diameter of about 3-6 mm. Clones below these dimensions might as well produce roots, but are unlikely to survive for long.
When cutting, try to produce as clean a cut as possible so as not to damage the mother plant or the cuttings. You can use a healing cream to help the mother plant seal the wounds created and recover faster, as these are dangerous entry points for pests and fungi.
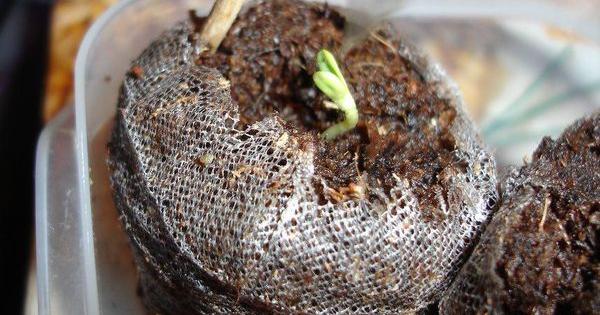
Once done, put the mother plant away and focus on the cuttings. The first thing to take care of is the rooting medium – i.e. the jiffys, the rockwool cubes or the substrate of your choice. If you're using pressed peat discs (jiffys), leave them to soak in warm water containing vitamin B for about 20-30 minutes. Jiffys swell considerably on contact with water, so make sure you use a container that is big enough for the number of cuttings you've taken – a 10-litre container will do in most cases. Also, by using warm water you'll speed up the substrate preparation process.
Rockwool cubes, in turn, need to soak for an hour in vitamin B fortified water with a pH of 5.5.
In order to allow easier insertion of the cuttings in the rooting medium, you can use a pen or similar tool to prick a hole that matches the diameter of the stems. Once done, remove the cuttings from the jug and dip the base (2 to 3 cm) in the rooting hormone for 5 seconds. Then, insert the cuttings in the rooting medium covering about 4 cm of stem. In order for root formation to occur, at least one node – ideally two – needs to be covered in substrate. Finally, cut the leaves to half size with horizontal cuts to reduce transpiration, as this helps reduce stress and aids faster root formation.
The next thing to consider is lighting. What works best is to use the same light schedule as for the vegetative period, so set your lights to an 18/6 cycle (hours of light/hours of dark) and put your cuttings in the mini greenhouse. Keep the ventilation slots closed for the first two days in order to maintain humidity at about 90-95%. This will need to be reduced to 80-85% during the following week, with levels never falling below 70-75%.
As for temperature, you should try to keep it between 24 and 28 ºC. Cuttings that are kept at constant warm temperatures have a stronger chance of rooting, so consider using a heating mat if your grow area is too cold.

Now that everything is ready, the only thing left is to monitor the clones until they root. This routine involves spraying the clones with filtered or mineral water whenever they start to look dry and opening the lid of the mini greenhouse at least once a day in order to bring in fresh air – otherwise the substrate could develop mould and kill the clones.
Sometimes, the cuttings wilt at first, but recover naturally after a few days. Should this not happen, you'll have no choice but to discard them and start over from scratch.
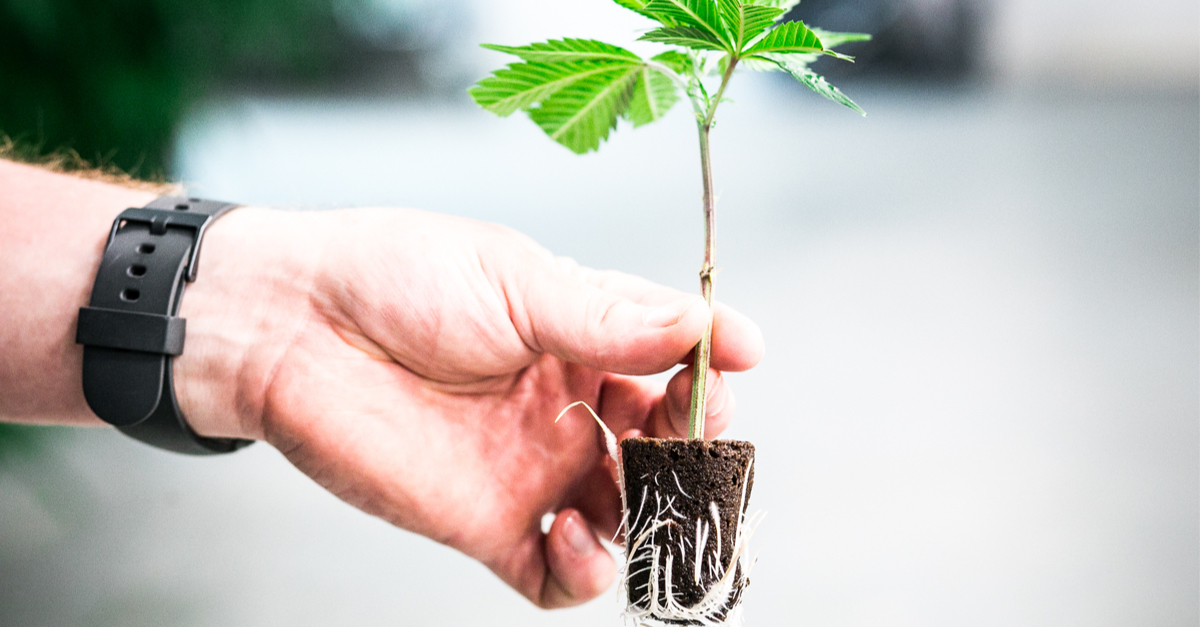
As a rule, the roots take from 1 to 3 weeks to appear. Sometimes they grow so vigorously that they cause the tips of the leaves to yellow. You may also see roots coming out the holes in the pots, and notice the stem has resumed growth.
These signs will let you know the cloning process has been successful. At this point, all you have to do is wait for the root mass to settle down and transplant the cuttings into a bigger pot.
There you go! You can now proceed with your gardening work as you normally would.
Comments from our readers
Read comments in other languages:
Did you like this post?
Your opinion about our seeds is very important to us and can help other users a lot (your email address won't be made public).