
- With so many cannabis growing methods available, it is always interesting to discover new techniques to bring some variety to your grow room.
- Today, we’ll introduce you to a method that will allow you to continuously produce cannabis flowers in a small indoor growing area so that you are well supplied even when space is an issue.
- Read on to find out how to increase your annual yields with the method of crop rotation. As you’ll see, it’s mostly all about planning.

If you are an indoor grower who lacks the space to produce large crops, you may be wondering how you could increase the productivity of your grow room. Oftentimes, the problem of low productivity arises because growers wait until harvest before they start a new grow, creating a period of scarcity between grows.
This, however, can be easily remedied through crop rotation, a method that will ensure you never run out of ready-to-consume cannabis flowers.
Necessary equipment for your crop rotation
Setup 1 – small, all-in-one style growing area
- Dual grow tent: Choose a grow tent consisting of two separate lightproof chambers – one for the growing period and the other one for flowering. Dual grow tents are perfect for small indoor setups as they allow to make the most of the available space. The vegetative chamber is on two tiers with the same photoperiod (18 hours of light and 6 hours of dark/growth), the lower one for propagating clones and the upper one for preserving small mother plants. The biggest chamber, instead, is intended for plants in the flowering stage.
- 150/200W CFL lamps or fluorescent tubes (T5): Two lamps should be enough to light up both the seedling and the mother plant area in the vegetative chamber. Both CFL lamps and fluorescent tubes are low heat, energy efficient solutions which produce a spectrum that is optimal for the vegetative stage. However, if height is an issue, you should opt for fluorescent tubes, as they're not as bulky as CFL lamps.
- 315W LEC lamp: This low heat lighting solution is very well suited to crop rotation and provides the perfect conditions for the flowering stage. While still not very widespread, the coming years will definitely see more and more growers opting for LEC lamps.
- Light hanger: In this type of setup, light hangers are intended only for use with LEC lamps, as CFL lamps and fluorescent tubes need to stay fixed to the grow tent structure. The options available include pulleys like those provided by Easy Rolls and adjustable straps with safety clip (Light Hanger type).
- Exhaust/intake fan: In a grow this size, passive air intake should be enough to keep both the vegetative and the flowering chamber well aerated. As for air extraction, you'll need an exhaust fan with an air renewal rate of about 310 m3/h for the vegetative chamber and of about 470 m3/h for the flowering chamber.
- Active carbon filters: Cannabis tends to be frowned upon in many situations. So if you live, let's say, in an apartment, and you'd rather not risk running into trouble with your neighbours, you should consider using a high-performance active carbon filter from the outset. While this is a must for the flowering chamber, you can use the alternative below for the vegetative chamber.
- Odour neutraliser: Available as gel, solid wax (Ona) and sprays (Citrus Magic), odour neutralisers mask the odour of plants in the grow tent. Do not hesitate to use them jointly with your active carbon filters.
- Clip fans: In order to ensure proper air circulation in the grow tent, you'll need to install a fan (20-25 cm diameter) in every growing environment – one in the flowering and two in the vegetative chamber. Clip fans are great options for this type of setup since they can be easily fixed to the grow tent structure.
- Humidifier/dehumidifier: You'll only need one if the humidity levels inside your grow tent are not optimal.
- Digital timer: Since you will be using two different photoperiods (18 hours of light and 6 hours of dark in the vegetative chamber/12 hours of light and 12 hours of dark in the flowering chamber), you'll also need two digital timers.
- Multiple socket/extension cords: Use models that meet European safety standards to ensure the proper functioning of your electrical equipment.
- Plastic or fabric pots: Given the dimensions of the grow tent, you should only use small/medium-sized pots – with a capacity of 4-7 litres for flowering plants.
- Small plastic pots (rooting medium for clones): Tiny pots filled with topsoil are perfect for rooting cuttings. Choose the size based on the number of clones you plan to grow.
- Mini greenhouse: This is the environment where your cuttings will root, so make sure you choose a high-quality model that provides optimal conditions for rooting – i.e. high air humidity. Use one greenhouse if you plan to only grow cuttings in the vegetative chamber and add a second one if you also intend to keep a few small mother plants.
- Seedling and cutting soil: Ensure the proper development of your cuttings and seedlings by using a light mix consisting of peat and perlite.
- Grow and bloom soil: The vegetative and flowering stages respond better to rich soil. Just head to your local grow shop and you'll be spoilt for choice.
- Fertilisers: Use the nutrient line of your preference, always remembering it should include a root booster.
Setup 2 – 10-square-metre grow room
This type of setup uses the same equipment as the setup above, with the only difference that two grow tents are required, one of which divided into two identical tiers for keeping small mother plants and rooting cuttings – something of a plant nursery – and the other serving as flowering chamber. The recommended size is 100x100cm for both grow tents, but you if you have room to spare, you can adapt it to your specific needs.
Related post
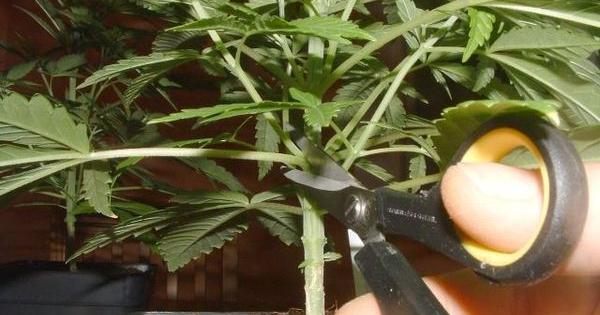
Essential trimming techniques for your cannabis plants
How to set up your indoor growing area for continuous production
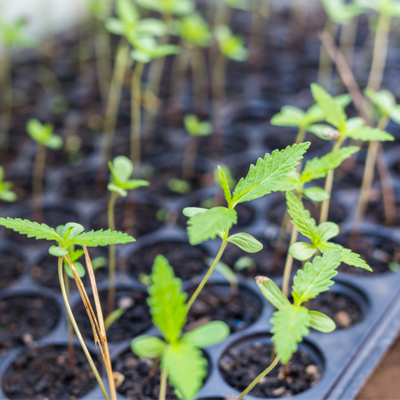
The first thing to do is decide whether you'll grow from seeds or cuttings. If you go for seeds, you'll have to germinate them (for 2-10 days at most) before you can put them in the grow tent, while if you choose cuttings, you'll need to address the rooting stage first (15-20 days). Another important consideration is that you'll need to vegetate at least 8-10 plants with which to fill the flowering chamber in order for your crop rotation to be profitable. This is why it is vital that you start more seeds or root more cuttings than the actual number of plants you intend to grow. Otherwise, you risk falling short of your target.
Once done, put the germinated seeds or the rooted cuttings either in a temporary substrate like pressed peat disc (jiffys) or in a small pot filled with light soil containing peat and perlite, making sure not to over compact the soil mix so as not to hinder root development – a well aerated soil contributes to faster plant development.
Once the seedlings have developed strong enough roots in the temporary substrate – some may even come out the holes in the pots – you'll have to transplant them into a four 4-litre pot before moving them to the vegetative area and, eventually, to the flowering chamber.
Use a photoperiod of 18 hours of light and 6 hours of dark during the vegetative stage, the duration of which will depend on how vigorous the strain you're growing is. As a general guideline, sativa-dominant hybrids vegetate for 2-3 weeks and indica-dominant hybrids vegetate for 4-5 weeks. In any case, the vegetative stage needs to be long enough to allow for cuttings to be taken without it affecting plant development.
Once you've taken the cuttings, put them in the growing chamber with the right lighting conditions and photoperiod – the same as mentioned above – so as to ensure optimum growth conditions.
When the vegetative stage is over, repot the plants into 7-litre pots before you move them into the flowering chamber in order to ensure smooth flowering. Set a flowering photoperiod (12 hours of light and 12 hours of dark) and that's it. At this point, all you'll have to do is tend the 8/10 plants in the flowering chamber as you normally would while you wait for harvest.
But let's go back to the cuttings left to root in the growing chamber. These shouldn't need more than three weeks to grow roots, but of course you won't be able to move them to the flowering chamber as the plants inside it will still need some more weeks before they can be harvested. As a general rule, all strains need at least 4-5 weeks to flower, including the fastest ones.
While you wait, you can start to take cuttings from the mother plants. The process is very simple: you just have to bear in mind that the clones need to be ready by the time you harvest the plants in the flowering chamber, always allowing at least 3 weeks for the rooting stage.
If you prefer to start your next grow with a bit less pressure, you can root the cuttings about two and a half weeks in advance so as to make sure you have enough time to harvest the plants, set up the drying room and clean the flowering chamber.
In order to successfully coordinate all growth stages, you'll need to inform yourself on the stretch of the strain you're growing. Stretch is a way of referring to the period in which the plant continues to grow even if the photoperiod has been changed to 12/12 (flowering). This stage lasts from 10 to 15 days depending on the strain, and just as the flowering period, is key when it comes to planning the grow cycles. It might sound complicated, but once you get familiar with the method, you'll realise it is as simple as obtaining the relevant data on each strain and planning the growth stages accordingly.
You should move the cuttings to the flowering chamber as soon as they root, changing the photoperiod to 12/12
In order to simplify the process, we recommend that you start out by growing just one strain, gradually increasing the number of varieties as you become familiar with the method.
Regardless of whether you're growing from seeds or cuttings, from the second grow cycle onwards, you should start getting familiar with how each strain behaves, which will allow you to reduce the duration of the growth cycles, harvesting more in less time.
If someone offers you an elite clone, remember to ask them about the stretch and the flowering period, otherwise you won't be able to successfully complete your grow. And the same applies to seeds. Try to obtain as much information as possible in order to get the hang of the method faster and optimise the potential of your grow.
Now's your turn… We wish you the best of lucks with your crop rotation!
Comments from our readers
Read comments in other languages:
Did you like this post?
Your opinion about our seeds is very important to us and can help other users a lot (your email address won't be made public).